Total Pageviews
Wednesday, April 20, 2011
Pictures!
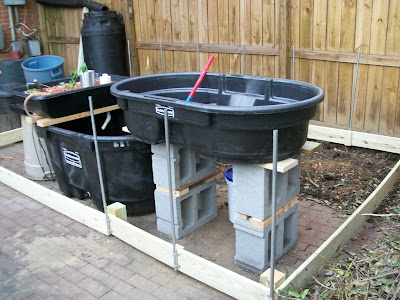
This is the state of things a week or so ago - prior to me discovering that I had utility cables running only a few inches below the surface and wouldn't be able to dig down.
My mustard plant, while it was still planted inside.
The current state of the greenhouse. I made it short because the townhome covenants say structures have to be no higher than the brick wall at the end of the property. FWIW, my next door neighbor is going to have to remove the fancy storage shed you see in the pics - not a happy thing to learn after you've spent time and $$ putting something in...
The grow bed that is up and running. I used hydroton because I needed to get one bed working to host plants that were inside, since I moved my indoor growbed outside. So nice not having to deal with gravel on the planting layer!
A bed prepped with gravel in the bottom. Theory is this will help anchor plants that would tend to fall over in hydroton or shale aggregate. Besides, it displaces $$$ of the more expensive lighter stuff, and it is already pregnant with the happy bacteria that transform ammonia to nitrate.
I'm waiting to get expanded shale aggregate for the final beds - having a local business special order it from Bigelow Brook Farm and TheAquaponicSource.com.
A shot of my bell siphon, showing the 45 degree bend and my new sliced drain tube. I have a small hole at the base of my standpipe so any extra water can drain out when power goes out (like at night if I turn off the pump). The good thing is I won't have plants drowning in standing water. The bad thing is I always have a small dribble. This sliced drain tube takes the trickle down to the water surface (no noise) and still lets the siphon break. It ingests air into the flow, but keeps the noise of the full siphon action pretty low.
Here's a detail of the construction. Because my townhome covenants require me to keep this thing really short, the PVC sleeves allow me to temporarily raise the roof an additional 24 inches. It's also more forgiving than EMT couplers would be. I drilled through the PVC and EMT and connected them using a toggle bolt - looks kind of spiffy, I think. I should have painted the PVC to extend the life of these legs, but it won't be too hard to replace them. Let's pretend I am leaving them unpainted on purpose, to see how long it takes for them to become so brittle they don't work anymore... Since the PVC sleeves aren't load-bearing, I should be good for a long time.
I used 10 foot wide sheeting, so had to join the roof sheeting with a 5 foot wide side piece. I did this by connecting the two sheets and rolling them around EMT conduit, then screwing the conduit to the frame with 2-hole straps using self-tapping screws.
The 2-hole EMT straps can also be bent so they serve as clips - useful for fastening the plastic until I have my end walls built.
Finally, a shot of my rain barrel. We made this at a county workshop using 65 gallon pickle barrels. It would be relatively simple to update the greenhouse design to include rain gutters if the greenhouse wasn't close to another water source. I don't have solar panels (yet) but the pump and bubblers draw in the neighborhood of 120 watts. Seems it would be perfectly possible to power a system like I've got here off solar, particularly if you shut the pump off at night.
So, those are the pics. Enjoy!
Subscribe to:
Post Comments (Atom)


Wow! When I left you yesterday afternoon you hadn't installed most what I see here.
ReplyDeleteYour project is coming along quickly. My wife is jealous that you are using 50 gallon grow beds. We're using 100 gallon and it's a big chore to fill them with gravel.
ReplyDeleteLooking Good, Miss Meg.
ReplyDeleteAre you finding the aggregate is altering your Ph? Hydroton and the Shale is supposedly Ph neutral, or at least stable. Limestone mixed in with your aggregate could potentially change the chemistry of your water. I imagine other types of rock could too.
I don't have the expanded shale yet, so don't know. So far the system is mostly river stones and hydroton, with a tiny bit of slate aggregate.
ReplyDeleteOn a different note altogether...
ReplyDeleteHere is a video I made of cutting an IBC tote into a tank and grow-bed
http://www.youtube.com/watch?v=J2mJF0Kwq34
Nice video, Tim - I look forward to seeing it in action!
ReplyDeleteReally great. I'm about to start one in Gladstone Australia. You have given me added inspiration. Enjoy.
ReplyDelete